• When you click on links to various merchants on this site and make a purchase, this can result in this site earning a commission. Affiliate programs and affiliations include, but are not limited to, the eBay Partner Network.

Decal style patches

Yardstick

Well-Known Member
A reasonably common type of WWII squadron patch was the water-slide decal (a design printed onto a transparent backing and not too dissimilar to the decals used for model aircraft kits). These were typically applied to leather or canvas backed 'leatherette' discs and commonly sealed with a transparent varnish. They're challenging patches to recreate, as they faithfully transpose the original artwork and require very crisp detailing. While I have considered experimenting with printing onto water-slide decals, this would only make sense if I was doing large runs. Consequently, I've gone down the route of painting the design directly onto leather but trying to ensure that this is as crisp as the original - no mean feat as the final patch is likely to be much smaller than the original drawing. I hope you like the following examples.

31st FS, 37th FG. Interestingly this is one of those patches where there are as many examples of the design facing right as there are it facing left.
Img_1282.jpg


398th BS, 504th BG.
Img_1283.jpg


73rd FS, 318th FG.
Img_e2016.jpg
 

ausreenactor

Well-Known Member
A reasonably common type of WWII squadron patch was the water-slide decal (a design printed onto a transparent backing and not too dissimilar to the decals used for model aircraft kits). These were typically applied to leather or canvas backed 'leatherette' discs and commonly sealed with a transparent varnish. They're challenging patches to recreate, as they faithfully transpose the original artwork and require very crisp detailing. While I have considered experimenting with printing onto water-slide decals, this would only make sense if I was doing large runs. Consequently, I've gone down the route of painting the design directly onto leather but trying to ensure that this is as crisp as the original - no mean feat as the final patch is likely to be much smaller than the original drawing. I hope you like the following examples.

31st FS, 37th FG. Interestingly this is one of those patches where there are as many examples of the design facing right as there are it facing left.
View attachment 65113

398th BS, 504th BG.
View attachment 65114

73rd FS, 318th FG.
View attachment 65115
Awesome job mate..
 

Yardstick

Well-Known Member
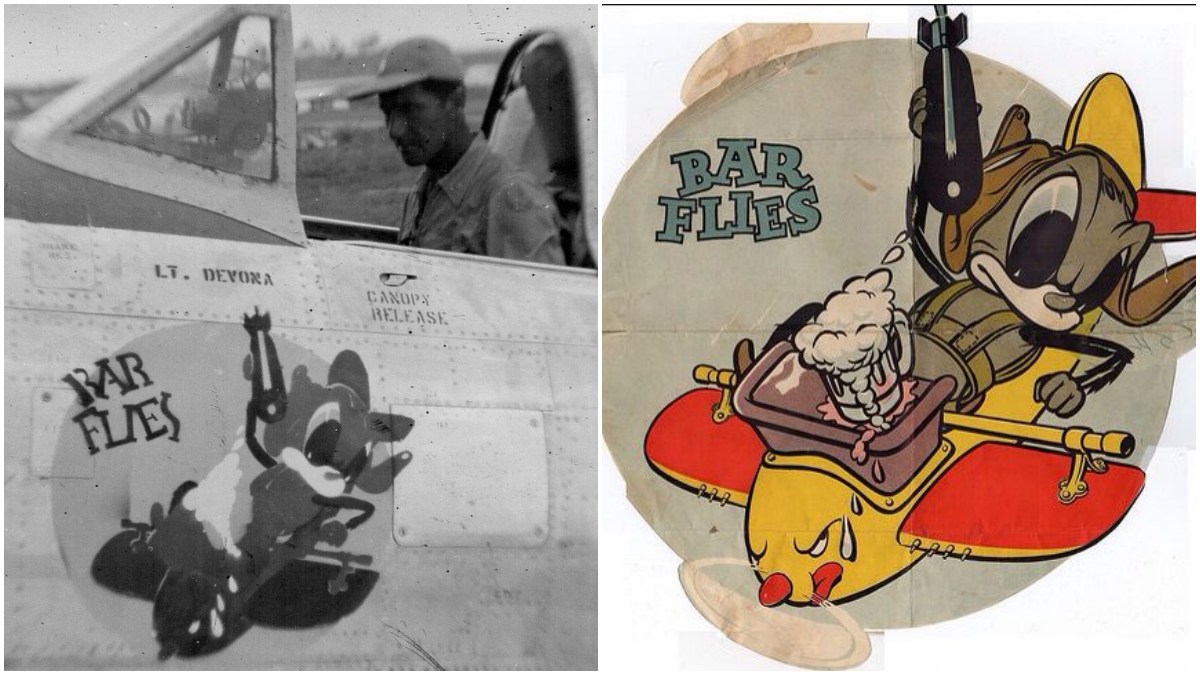
Yes the above was my source :D. I did make a change to the size and positioning of the text to match another version of the patch I found on an A-2.

I love the stylised bar, complete with brass rail. Curiously, the aircraft has 3 guns in the right wing but 4 in the left - another of the little quirks that makes this hobby so compelling.
 

ausreenactor

Well-Known Member
Yes the above was my source :D. I did make a change to the size and positioning of the text to match another version of the patch I found on an A-2.

I love the stylised bar, complete with brass rail. Curiously, the aircraft has 3 guns in the right wing but 4 in the left - another of the little quirks that makes this hobby so compelling.
Meta Human!

True though...
 

Yardstick

Well-Known Member
Aggh - now I look at the original decal again I see I have missed out the white highlights on the nose / prop hub :mad:.

The perfectionist inside compels me to correct the omission immediately, it's going to take all my will power to put that off until tomorrow morning :rolleyes:.
 

bseal

Well-Known Member
Aggh - now I look at the original decal again I see I have missed out the white highlights on the nose / prop hub :mad:.

The perfectionist inside compels me to correct the omission immediately, it's going to take all my will power to put that off until tomorrow morning :rolleyes:.

Cold busted. Wasn’t going to say anything about it. What happens at VLJ, stays at…

;)
 

Yardstick

Well-Known Member
I’ve learned over the years that it’s actually good practice to photograph your work and use that to spot errors & omissions. I don’t know why but what can be invisible in the real version, will jump out of the screen with a photo.

A while back, I mentioned this to my wife who is an artist and she had independently discovered the same thing.
 
Top