
-
When you click on links to various merchants on this site and make a purchase, this can result in this site earning a commission. Affiliate programs and affiliations include, but are not limited to, the eBay Partner Network.
You are using an out of date browser. It may not display this or other websites correctly.
You should upgrade or use an alternative browser.
You should upgrade or use an alternative browser.
My next , maybe-insane-to-try project is...
- Thread starter deand
- Start date


deand
Active Member
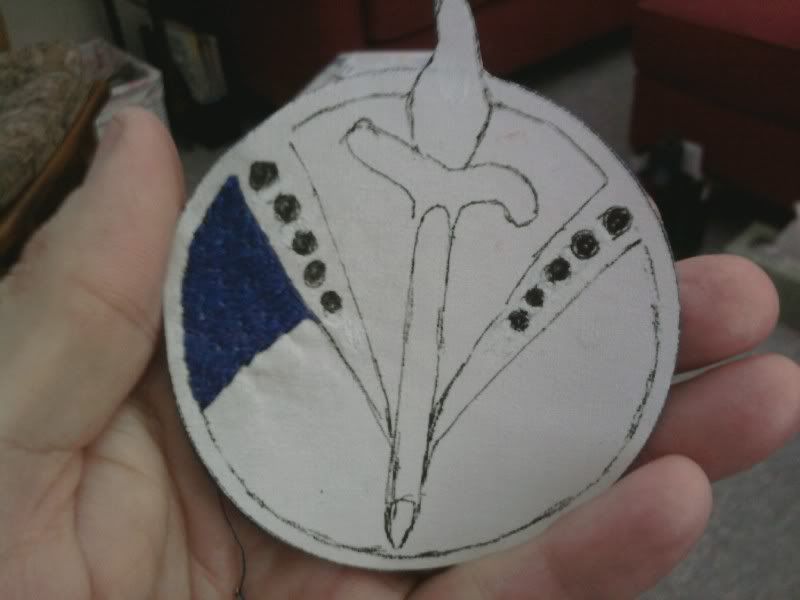
Progress. I'm guessing 2 1/2 hours total time spent. It's like whittling, you just keep at it. Even after you think you've stitched it pretty heavily, you see the white backing showing, if only in minute ways. I intend to give it all the thread I've got. I just need to see some progress to stay motivated.
dean
dean
deand
Active Member
dmar836 said:Looks good. Do you have a pattern of rows you follow? The details of the stitches is hard to see.
Dave
No, Dave, Actually I just try to overlap from one side to the other, roughly following each stitch with the next. There are a lot of random over-stitches attempting fuller coverage, but it really looks okay. having never done this before, I know I'm devoid of technique. I will learn.
dean
EMBLEMHUNTER
Well-Known Member
For just starting out at something new, it's looking good so far , I would imagine that all the people that did them by hand had different ways they sewed them too , it's like anything else when doing it the first time,Trial and Error, but hopefully not too much error, good luck and lookig forward to the finished work !
Johnny
P.S. if it comes out right ,you're probably opening a big can of worms , as all the forum patch collectors will be bombarding you with Orders for patches they'll want !!!!!
Johnny
P.S. if it comes out right ,you're probably opening a big can of worms , as all the forum patch collectors will be bombarding you with Orders for patches they'll want !!!!!
deand
Active Member
Incremental is the word for it! I've noticed the stitiching has ever so slightly distorted the perfect circle I had. I used a piece of iron-on linen-like T-shirt transfer material ironed onto a piece of felt for backing. I am tempted to start over on some other type of rigid permeable material that will not distort. If I continue with this, I imagine the white thread embroidering will be the way I will correct any deviations from the pattern I used, since it is very difficult to work form the photo I had of the original, not being a large photo, or a very clear one. I also need to stitch with greater density, the desire to move ahead causes one to spread them out, causing too much backing to show. One lazy solution to this that I thought of was to stitch over pre-colord section corresponding to the thread color, too bad I didn't think of that sooner! :roll:

dean
dean
EMBLEMHUNTER
Well-Known Member
You might want to try this site for a better image of the patch, usafpatches.com
Johnny
If you find a usuable shot, hit your enlarge button on your PC and take a photo , that works !
Johnny
If you find a usuable shot, hit your enlarge button on your PC and take a photo , that works !
deand
Active Member
EMBLEMHUNTER said:You might want to try this site for a better image of the patch, usafpatches.com
Johnny
If you find a usuable shot, hit your enlarge button on your PC and take a photo , that works !
It's a great site! The reason I'm using this one photograph is that there are so many variations of the squadron patch, and of those variations, this is the only one I can find on an actual cap from the era. The guy that owns it is a member of the US Militaria Forum, and as much as I would like to ask him to photograph the patch up close, I just don't want to bother him about it.
dean
I would think he wouldn't mind. I get emails all the time about a motorcycle I built. I answer each one. It does become a pain but usually when I know they didn't read my blog about it and just want a quick answer based on a pic they saw..... or worse, a detailed how-to question.
Write him and hope for aa better shot.
I think the colored background is a great idea.
Dave
Write him and hope for aa better shot.
I think the colored background is a great idea.
Dave
a2jacketpatches
Active Member
I've embroidered a hand full of patches in the past, the issue about losing shape is a very familiar one. As you work from the outside in, each component will pull along the direction you are going. Eventually, you will get to the details and they will be distorted, especially straight lines. I foresee a lot of work ahead of you with quite a few problems. Just a few tips to follow that will save you some serious headaches. Work from the very center out, equally, meaning if you do ten stitches on the left stripe do ten on the right all the way to the perimeter. Don't worry about the exact perimeter, but more so the approximate perimeter, and keep filling til you're very close. When the entire field is almost filled, then draw a nice sharp circle and finish it evenly. All of the pulling is pretty much done at this point. Think of the whole thing as filling from the inside out like an explosion. Using an embroidery hoop while doing this makes things even more accurate.
I'll post a photo of a patch that I lost motivation with as parts of it got distorted. I can safely guess that the patch at this point has 6 hours into it. Only a fraction of the blood sweat and tears put into learning embroidery.
I will be offering only my very favorite designs in embroidery soon, as it take a lot of time and part labor of love will help.
a2jacketpatches
Active Member
<a href="http://s872.photobucket.com/albums/ab284/a2jacketpatches/?action=view&current=patchemb011.jpg" target="_blank"><img src="http://i872.photobucket.com/albums/ab284/a2jacketpatches/patchemb011.jpg" border="0" alt="Photobucket"></a>

a2jacketpatches
Active Member

You can see the scroll shrink on the right side due to the extensive work on the wing and glove. I should have done all solid components first and then place the scrolls after, meaning totally leave them out until all other details are done. It's even a good idea to pre-shrink before lettering.
deand
Active Member
a2jacketpatches said:I've embroidered a hand full of patches in the past, the issue about losing shape is a very familiar one. As you work from the outside in, each component will pull along the direction you are going. Eventually, you will get to the details and they will be distorted, especially straight lines. I foresee a lot of work ahead of you with quite a few problems. Just a few tips to follow that will save you some serious headaches. Work from the very center out, equally, meaning if you do ten stitches on the left stripe do ten on the right all the way to the perimeter. Don't worry about the exact perimeter, but more so the approximate perimeter, and keep filling til you're very close. When the entire field is almost filled, then draw a nice sharp circle and finish it evenly. All of the pulling is pretty much done at this point. Think of the whole thing as filling from the inside out like an explosion. Using an embroidery hoop while doing this makes things even more accurate.
I'll post a photo of a patch that I lost motivation with as parts of it got distorted. I can safely guess that the patch at this point has 6 hours into it. Only a fraction of the blood sweat and tears put into learning embroidery.
I will be offering only my very favorite designs in embroidery soon, as it take a lot of time and part labor of love will help.
Everything you have just posted here is a godsend! Thank you! How I wish I had known this before I started! It is going exactly like you have described. All that is left is to give up!
 You can probably guess that I'll keep trying, probably because I'm not at the 6 hour mark just yet. If I quit this one, I would immediately begin on another attempt taking into account your wisdom and following your advice. One question: What would you recommend for a backing to work on? You know, I don't really mind the sewing, it's the unforseen deterioration of the design elements that is frustrating. I need to get some curved needles, too. The hoop looks like a must have as well. Thank you very much, again, I very much appreciate your help!
dean
deand
Active Member
Re: My next , maybe-insane-to-try project is...DONE!
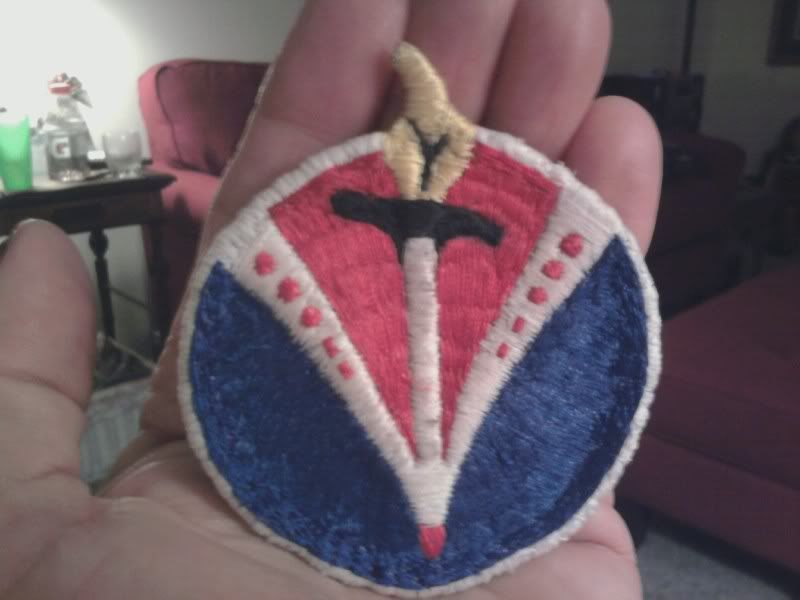
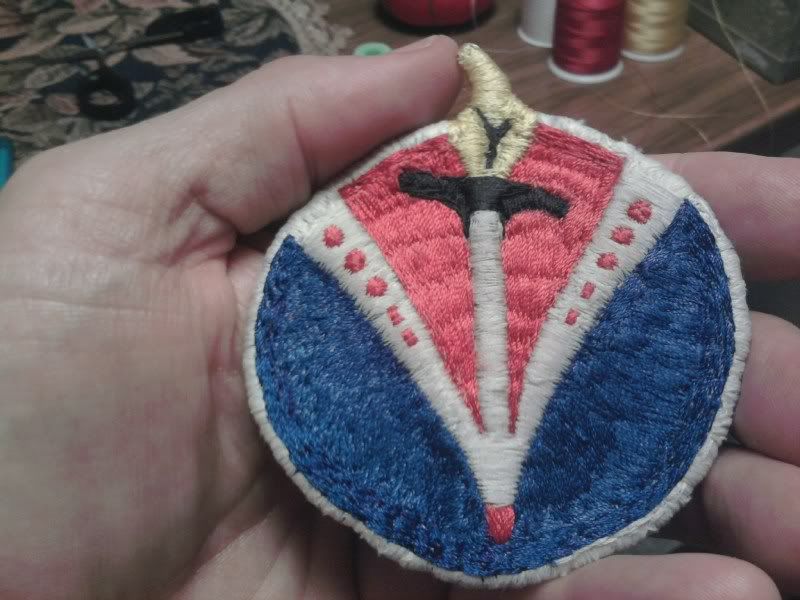
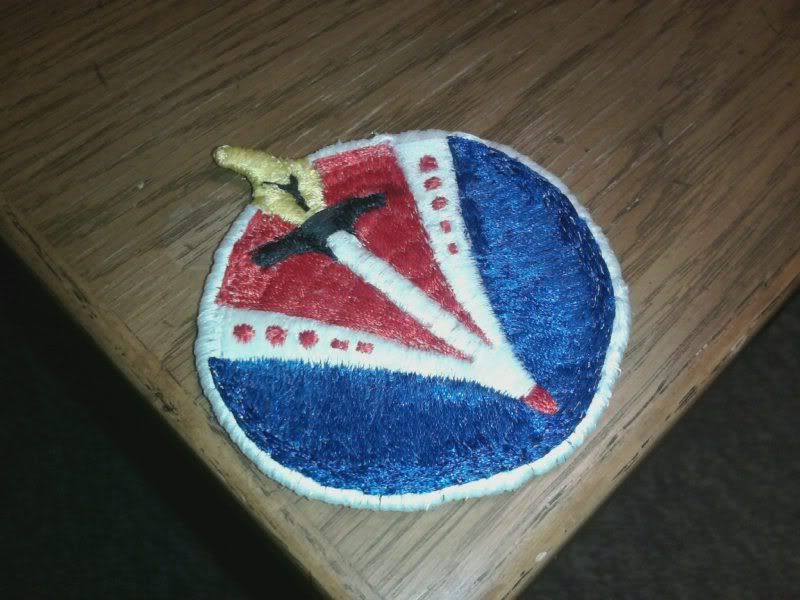
23 days after beginning, the patch is ready for attaching to the vinatge cap I have for it. If I ever do another one of these, I will definitely apply some of the wisdom gained the experiece and received from those who posted in this thread. Indeed, it is by no means perfect, but it is a reasonably accurate representation of a Korean war era 25th Fighter Interceptor Squadron patch.
dean