• When you click on links to various merchants on this site and make a purchase, this can result in this site earning a commission. Affiliate programs and affiliations include, but are not limited to, the eBay Partner Network.

531st Bomb Squadron as part of a restoration project...

ties70

Well-Known Member
Hi,

here is something I have finished last weekend:
As a part of a restoration project for a fellow VLJ member, I have reproduced a patch of the 380th BG's 531st squadron. The main problem was to make a patch that could fit to the original stitch holes, and match the overall appearance of the jacket...not too heavily aged but not brand new as well.

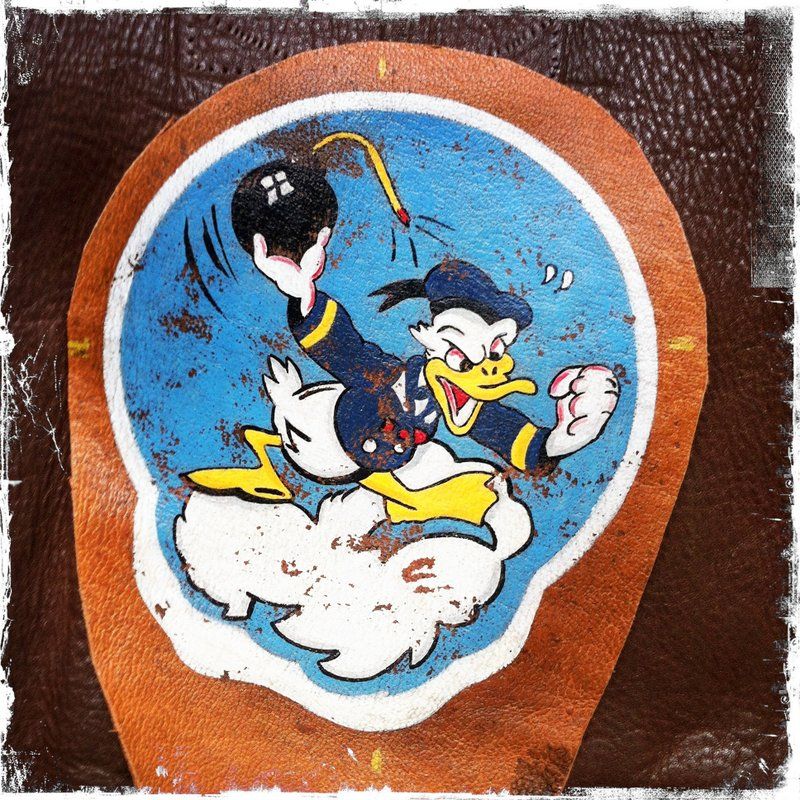
Here is what I came up with:
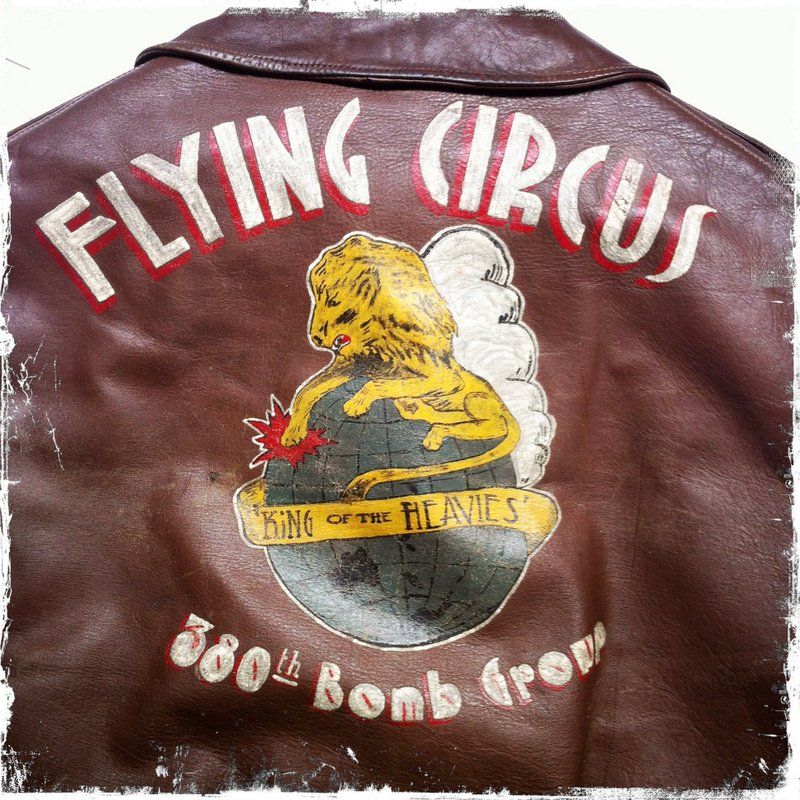
For the design I stuck to the more "folk art" style of Donald, as seen on this 380th BG's book:
380th_BG.jpg


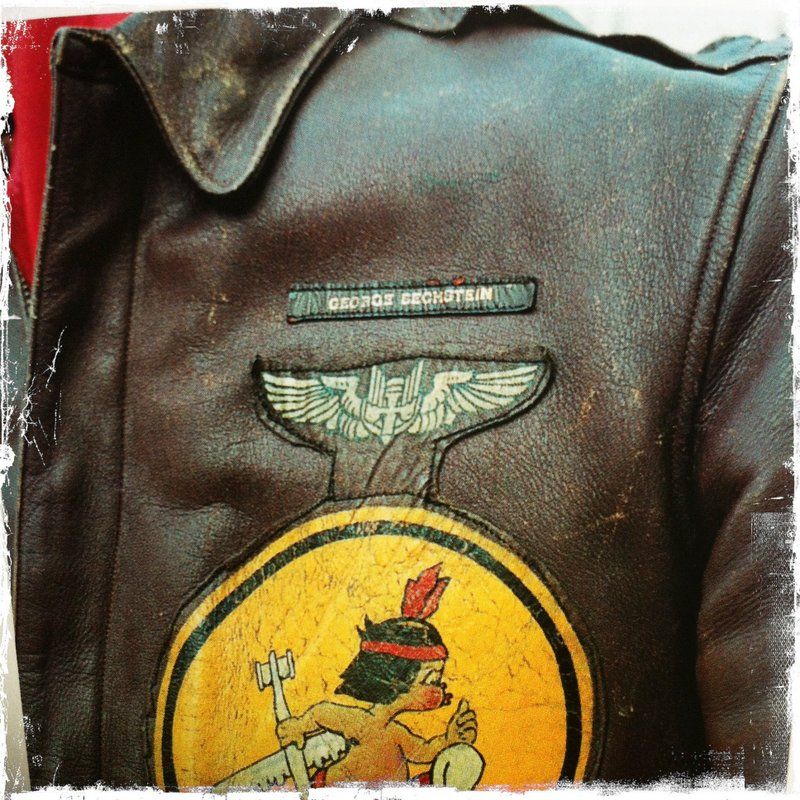
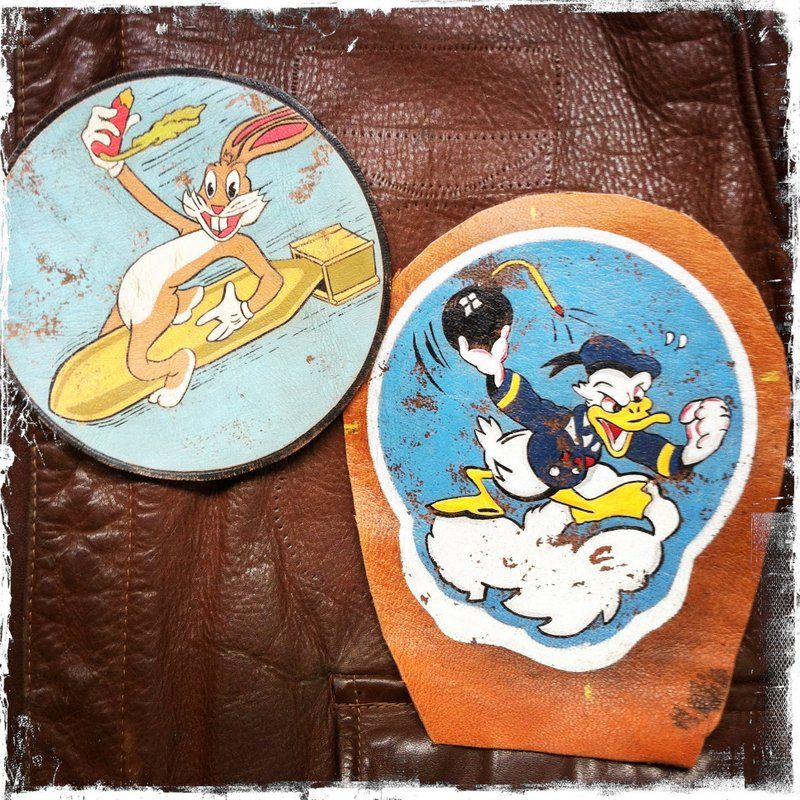
Pictures of original jackets show the 531st patches in various materials, from canvas, leather or embroidered. They all seems to have in common that the design is kind of "clumsy" and a little bit off-standard for Disney cartoons....anyway, here is my version:
531st_new.jpg


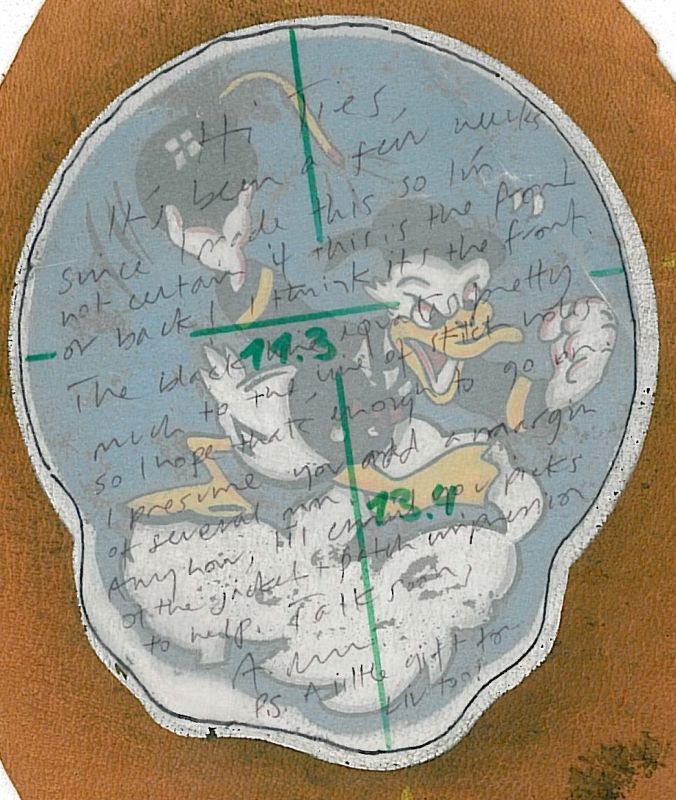
The stitch pattern is laid over the finished patch. As you can see, there is a little room to vary the position and still match the stitches.
531st_stitchline.jpg


The leather is very old and very soft.
It should be easy to stitch, and with its softness it should add almost no pressure on the existing holes.

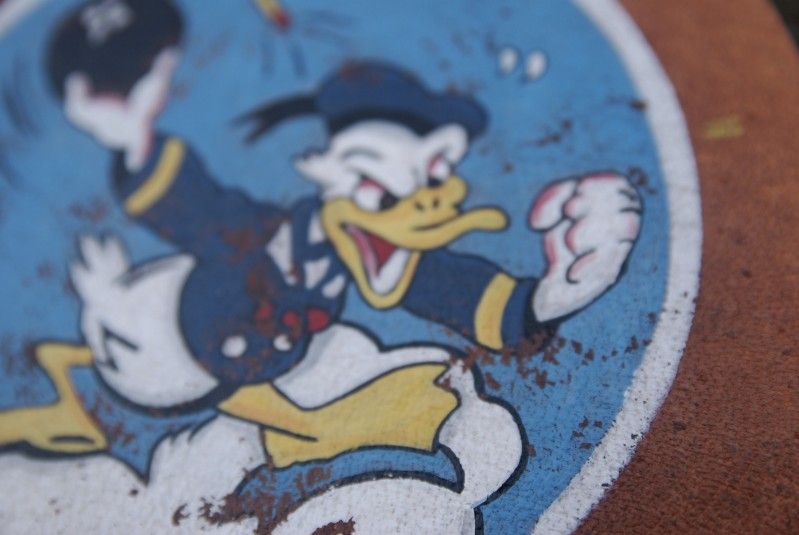
Here is a detail shot (the blue color is just a little off....)
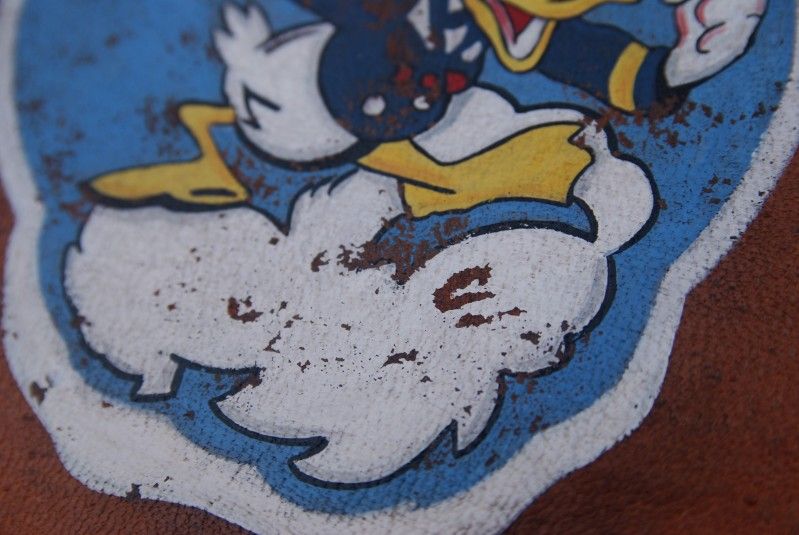
531st_detail_2.jpg


And another one:
531st_detail_1.jpg


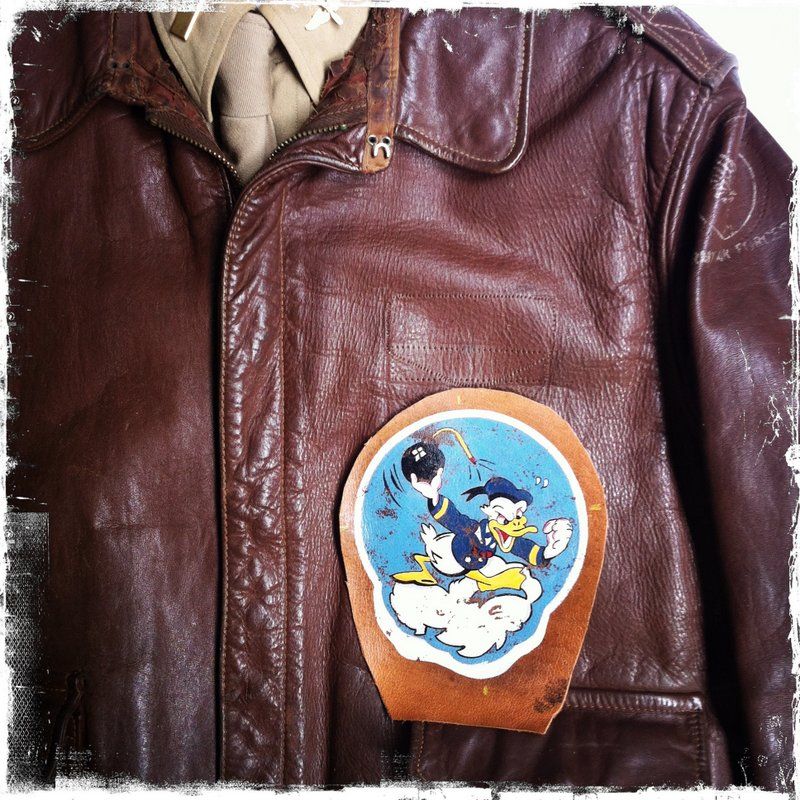
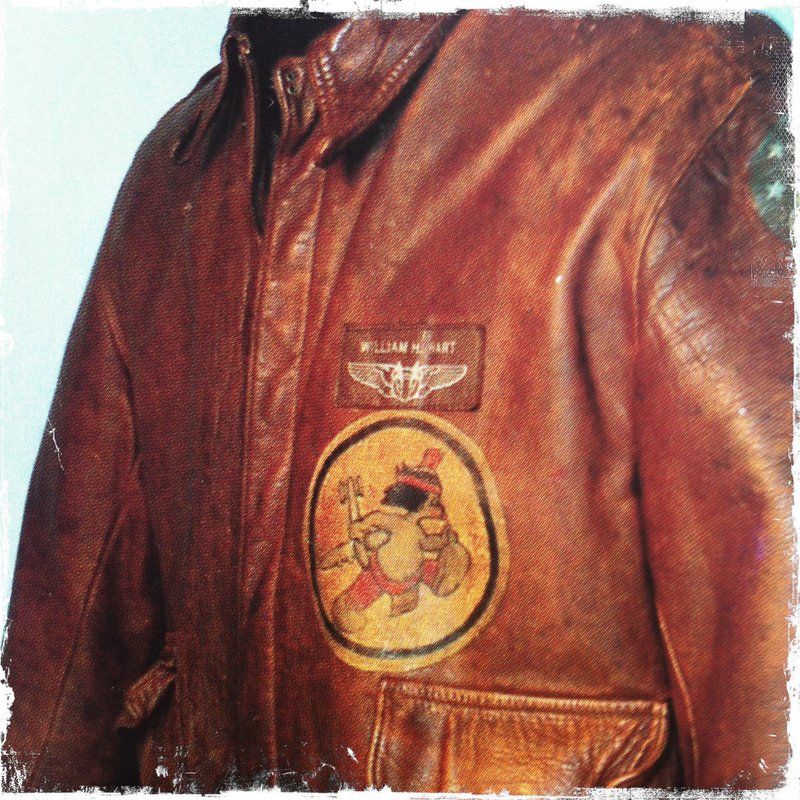
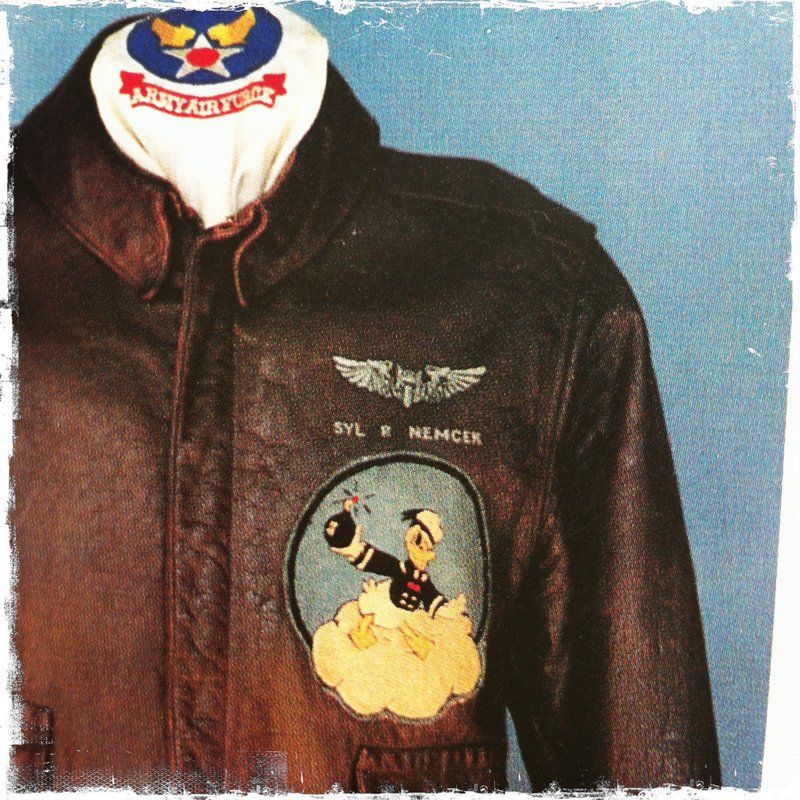
If everything goes how it should be, the final jacket will look like this:
531st_plus_A-2.jpg


Take care and best regards

Ties
 

ties70

Well-Known Member
Oscar,

I don't really scrape the color, I use duct tape to rip off the top color.
Slightly press it onto the patch, use more pressure at the areas where you want to rip off the color completely, and then pull the tape off with one fast motion.

Best regards

Ties
 

Andrew

Well-Known Member
What can I say Ties- Wow! As usual beautiful line work that's not too carefully done. It's going to be a challenge hitting the right holes but i'll see how we go. If it looks like the process might possibly cause damage I won't attach it...

You certainly are brave whacking a bit of duct tape on that beautiful artwork and then seeing what happens.

Can't wait to see it in the flesh.

Thanks again Mate, you are one talented non artist!
 

a2jacketpatches

Active Member
Andrew said:
What can I say Ties- Wow! As usual beautiful line work that's not too carefully done. It's going to be a challenge hitting the right holes but i'll see how we go. If it looks like the process might possibly cause damage I won't attach it...

You certainly are brave whacking a bit of duct tape on that beautiful artwork and then seeing what happens.

Can't wait to see it in the flesh.

Thanks again Mate, you are one talented non artist!

Agreed, Ties gets that perfect, but still hand made look.

About stitching into the original holes. A trick to that is this-

1/ Take a length of white thread plenty long enough to complete the patch and a hand sewing needle and go through at least one matching patch/ jacket / liner original hole.

2/ Continue under and over all the way around going every few stitches and pulling only tight enough to bring the holes together aligned. The next series or matching holes ( patch / jacket / liner ) should be fairly aligned enough for you to wiggle the needle through without much trouble.

3/ Once you have completed the rough stitching, secure the starting and finishing points together just enough to keep the patch in place. Be sure not to buckle the patch by pulling too tight.

4/ What you should have at this point is a patch that looks ridiculous stitched every few stitches with white thread. What you have done so far is lined up every few original holes for each layer. ( starting hole, hole #4, hole#8, hole #12, and so on all the way around ) And what this has done is roughly aligned all the holes in between ( 2,3, then 5,6,7 then 9,10,11 )

5/ Now with the finishing color thread of your choice, hand stitched or by carefully turning the wheel on a machine, start at your starting point again, and stitch all the way around. Let the needle find its way through the patch, then the jacket, then the liner. If the needle stops, back it up and try a new angle. Again, not too tight, but this time tight enough for your finish stitch.

6/ At this point, it'll still look ridiculous because the white thread is still in place. But the reason for it being white is now you remove it and any traces of it fairly easily without damaging the finish thread. It'll be easy to see and most should just pull right out. take tweezers or whathaveyou. to remove any other traces.

This trick is not a quick one unless you consider the time you will spend lining up each hole one after the other. And the problems you'd face doing it this way would take me another half hour to explain.

Hope I explained clearly enough, if not, I could put together a short example and take some photos.

WOW! After all that, I just realized there's no original holes on the patch because Ties made a new replacement! Well you could still use this method to get the jacket and liner matched up, position the patch, then poke holes from the liner side through the back of the patch very carefully and do it that way. Or maybe get a super close up of the stitch hole pattern to lay on top of the patch but you'd need a dead on size photo doing it that way.
 

Andrew

Well-Known Member
A-2 thanks for posting that detailed description and sorry i'd missed it before. When the time comes it'll be invaluable. Ties' patch arrived today and it is indeed a work of art and will work perfectly with the original jacket.

IMG_5116.jpg


IMG_5104.jpg


Orig artwork on the rear;

IMG_5107.jpg


A bit of background. I bought this jacket last year without provenance but luckily due to a vague serial stamp inside, the distinctive shape of the original patch and the great resources of the 380th BG site I eventually found the identity of the original Owner (Nav on Cruisin' Susan) and made contact with his Skipper. Now knowing all this it seemed fitting to complete the missing bits and restore it to look as it once had. However as much as I like the idea of seeing this jacket complete again the idea of messing with an original still sits a little uneasy with me. Plus there's the time it's gonna take to do it properly so it may be a long time coming if ever. I don't plan to sell it but if that ever happened any additions would be fully documented.


In all it needs to have the cuffs replaced (supplied by the Good Dr H, patch by Ties added, orig 5th felt shoulder patch I already have and i''d like to make up a nametag for Ralph (Lt Ralph Ensign) and nav wings that are as close to what he would have had originally. Looking at Maguires there were several types used in this theatre, and judging by the stitch holes i'd guess that the nameplate was one of those silver leaf stamped types possibly with the silver pilots wings below, and he's added a bespoke leather nav wings (tooled, stamped or painted) below and directly over the top of the rectangular patch. That's my best guess. So now i'll need to source both of those items.

Here's a few from Maguires from the same Group.
IMG_5108.jpg

IMG_5109.jpg

IMG_5110.jpg


While he was at it I asked Ties to age the 530th patch he'd made me 3 years ago. He really is a master, so thanks Mate...

IMG_5105.jpg
 

ausreenactor

Well-Known Member
Sensational work Ties. The jacket will look a million dollars and the addition will not look out of place..

Super jacket Andrew..

Couchy
 

TankBuster

Active Member
Very nice work on the patch.

Andrew, have you ever thought of attatching the items on a temporary basis. You could use acid free glue dots that will not permanently adhere to, or harm the leather. The jacket would look great for display and it would not harm the integrity of the original jacket. Just a thought. The glue dots can be found at most craft stores here in the states. I'm not sure about over there, but if you can't find them, let me know and I can send some over if you decide to go that route. ;)
 

capt71

Member
I wouldn't go completely by the patch images on the 380th BG cover. They are cloth repro patches the 380th BG Association (of which I'm a member) has for sale. They are not necessarily completely accurate to the originals--a case in point below: The first is the repro 529th BS patch the Association has. The second is an actual vintage 529th BS patch that was kindly given to me by a 529th Veteran.

529thBS Repro:
8202495179_55d636149e_b.jpg

529thBS Vintage:
8202492845_5906895567_b.jpg


In addition, the Association is required by Warner Bros (Bugs Bunny on the 530thBS patch) and by Disney Enterprises (Donald Duck on 531st BS patch) to pay them each a licensing fee to reproduce those patches, and the patches must be embroidered with the words "Warner Bros" and "Disney Enterprises, Inc" along the edge on the respective patches. Photos below:

530thBS Repro:
8202579523_cb803d32ca_b.jpg

531stBS Repro:
8203673234_da053cfd5b_b.jpg
 

Andrew

Well-Known Member
Both good points, especially since there's a high probability the original was embroidered felt (this was discussed a while back in another thread).

I think I know what you're referring to Jeff. I might take a look into that.
 
Top